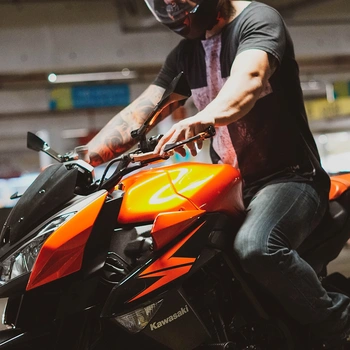
The clutch plate biting or engagement point or friction zone of a motorcycle clutch can change over time and vary within the clutch lever's working travel. Every clutch lever travelling depends on the type of clutch, how well maintained the clutch cable is, how worn the clutch plates are, and the types of motorcycle configuration. So expect the bite point to be in a different location on every motorcycle. Before moving to the motorcycle high clutch plate biting or engagement point, let us first understand what Freeplay is.
Table Of Contents:
Let's Get Started
Freeplay is the amount of lever movement from the rest position of the clutch to the point of cable resistance. Clutch lever Freeplay as manufacturer settings should usually be 0.5 mm-3.0 mm. To find it, you can measure the gap between the clutch lever and the lever housing. Adjustment of clutch lever Freeplay if necessary and should be checked if you are feeling any slack.
Check out this Universal Adjustable Brake and Clutch Levers with the following features:
- Universal fit for most motorcycles with 7/8inch (22mm) handlebar.
- Levers are made of CNC aluminium and anodized in the same colour for high durability and no fading.
- Both sides have a rearview mirror base, easy to install without drilling or welding.
- The six-gear distance can be adjusted to facilitate the use of different riders.
A wrong adjustment can seriously affect clutch operation and duration. Also, a worn clutch tensions the clutch cable. This is because of the starter interlock switch which is dependent on the clutch lever Freeplay being set correctly to ensure activation of the clutch safety switch.
Do remember to check the clutch cable for kinks or signs of wear. If necessary, have it replaced by your dealer. Lubricating the clutch cable with a commercially available cable lubricant is required to prevent premature wear and corrosion.
Lever Freeplay adjustment must be carried out with the cold engine and the motorcycle on its side stand, and the handlebar fully turned to the right. Squeeze the clutch lever toward the handlebar and release it. It should move freely and smoothly, and it should return to the rest position quickly when released. If the lever fails to perform as stated, service the clutch lever before riding.
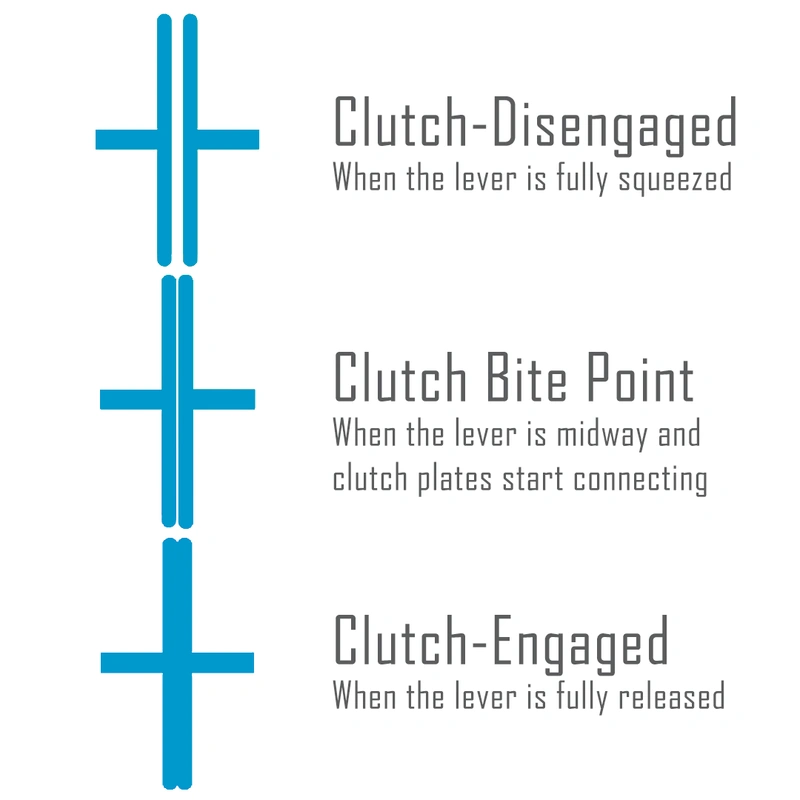
When operating the clutch lever (1), you must feel the passage from meagre resistance to very high resistance (driving force).

Determine ring nut (2) and adjuster (3) position; ring nut (2) must be at a distance (A) of at least 5 mm* from the lever rotation plate (4) and must not touch edge (5) of stop plate (6).
Operate the lever through its free play and check that distance "B" is between 2 mm and 3 mm*.
Adjuster (3), located on the lever, allows a maximum adjustment (C) of 11 mm, whereas the standard adjustment (starting one) is 5 mm*.
*Standard length mentioned above are for specific motorcycle and is a part of owner's manual of that bike
Motorcycle clutch plate biting point or engagement point
You can essentially release the clutch lever just before and just after the clutch plate biting or engagement point as quickly as you like. At the biting point, you need the transition to be smooth and steady with the clutch lever.
When the clutch is released past its biting point, the plates engage, and the engine will provide power to the back wheel. Keeping the clutch held inconsistently while riding is called "coasting" and is best avoided by motorcyclists. That is why it becomes essential to master your clutch control and get used to feeling where the biting point is.
The best way to find the clutch plate biting or engagement point on a bike with a cold engine is by taking it off the kickstand and with the motorcycle on its side stand, and the handlebar fully turned to the right. Start the engine and put the motorcycle into first gear. Make sure to do this on a flat surface so that you can keep your hand off the brake and not roll. Start to slowly release the clutch until you can feel the bike wanting to pull away: this is the friction point or biting point.
You will also notice the tone of the engine dip slightly as soon as plates start touching.
Do this gentle micro movement just enough so that you can pull the bike back with your feet – there should be no need to touch the brake. Pull the clutch back in and repeat this process a few times to store it in your muscle memory. It's worth doing a quick check of where the biting point is on every bike you ride. Nothing will make you feel sillier than hopping on your mate's bike for the first time only to skip past the biting point and stall.
Adjusting high clutch plate biting point or friction point
Actually, the clutch levers on small-displacement bikes don't have a big throw, to begin with, and therefore adjustment is pretty significant. If your fingers are long enough, set your clutch lever on 1. This will maximize clutch lever travel giving you the best chance for full disengagement as you pull the lever to the grip.
Set the amount of cable play at a couple of mm's or so when pulling on the handle before the lever on the clutch case moves. If you move your engagement point close to the handlebar as per your preference, when shifting gears abruptly, you will often not have full release of the clutch that taxes your transmission cogs unnecessarily.
Typical adjustment can be handled at the lever as follows.
Upper Lever Adjustment: Firstly, try to make adjustment with the upper clutch cable adjuster.
- Pull back the rubber dust cover.
- Loosen the upper lock nut.
- Turn the upper clutch cable adjuster until the Freeplay is as per the manufacture's prescribed limit in the owner's manual. Usually, it is between 1mm to 3mm.
- If you want your biting point to be lower than prescribed for your motorcycle, then you need a bit of slack. This will increase with the Freeplay 'mm' you increase.
- Tighten the upper lock nut and recheck the Freeplay.
- Install the rubber dust cover.
Lower Adjustment: If the upper clutch cable adjuster is threaded out near its limit, or the correct Freeplay cannot be obtained, attempt adjustment with the lower adjusting nut.
User’s suggestions:
"I just installed a set of Pazzo levers on my 2018 1200 XRT partly to solve this very problem (clutch bite too far out). These levers look way better than those hideous factory things, are more comfortable on the fingers, and adjust down enough to bring the 'bite' much closer to the bar. I got long on the clutch and short on the brake, which appears to be the bike's standard fitment. Got chose black levers with silver adjusted for the maximum 'stock' look. With setting #1, the clutch bite is about halfway out from the main highway."
"Yes, you can adjust the free play - that will change where the clutch engages relatively to lever travel. Loosen the cable using the barrel adjuster - rotate it clockwise. Make sure to keep the free play within spec, and make sure the clutch fully engages and disengages (should be roughly when the lever is parallel with the bar at max free play). I like to run my clutch lever at the max free play because I have small hands and it makes the clutch easier to modulate/control off-road."
"With the bike in neutral, pull the clutch lever toward the handlebar and let it go, pulling the clutch cable's housing away from the barrel adjuster with your right hand as you release the lever. This takes the tension off the barrel adjuster so you can quickly turn it either way with your left hand. Release the clutch cable housing back to its natural position, put the bike in first, and see if you like your new friction zone. Repeat this process until you get to the spot where you want it. You can do this sitting on the bike or standing next to it."
Adjusting biting point with burned Clutch plates
There happens a case when being new to the riding scene, and your friend tries to "guide" you on how to do a burnout. After a few failed attempts you will realize that your clutch biting point has now shifted by a lot, like instead of releasing the clutch a little to hit the biting point, you will now have to release all the way to get the clutch to kick in gear.
Actually, small-displacement bikes only have a few clutch plates. It's entirely possible you might have burned your clutch just not completely. It's like taking a considerable amount of life off it, and you'll probably want to replace it. If it's biting very far out, it could go at any time and leave you stranded. Your bite point is further out because there is physically less clutch material and your slave cylinder is travelling further to make contact.
You might adjust the clutch cable as a temporary fix, but it's quite likely you shortened the clutch life dramatically.
Additionally, all of that friction material from the clutch will circulate in your oil. You might want to change the oil and filter sooner rather than later.
On a positive note, motorcycles like Yamaha YZF-R15 only has four friction and three steel plates - a replacement clutch is relatively cheap.
FAQs
How to adjust clutch lever?
To adjust your motorcycle’s clutch lever, pull back the rubber dust cover, loosen the upper lock nut, and turn the adjuster. Set the Freeplay between 1mm and 3mm, then tighten the lock nut and reinstall the dust cover.
How to adjust motorcycle clutch lever position?
You can adjust the clutch lever position by using the dial near the lever base. Rotate it to move the lever closer or further from the handlebar, based on your comfort and hand size.
How to adjust motorcycle clutch free play?
Loosen the upper adjuster’s lock nut, turn the adjuster to set the free play to the recommended range (1-3mm), and then tighten the lock nut. This ensures proper clutch operation.
How to tighten clutch lever?
To tighten the clutch lever, turn the adjuster counterclockwise to increase tension. Be cautious not to over-tighten, as it could stress the cable and reduce clutch performance.
How to adjust a motorcycle clutch cable?
Start by adjusting the upper clutch cable adjuster near the lever. If necessary, use the lower adjusting nut near the engine to fine-tune the clutch cable tension.
How to loosen clutch lever?
Loosen the clutch lever by turning the adjuster clockwise. This increases slack in the cable, making the lever easier to pull, but ensure the free play remains within safe limits.